Use Notion as a Form Backend
Heysheet allows you to connect a form to a Notion database, turning your Notion workspace into a powerful Notion form backend. This guide explains how to set up your form to send submissions directly to a Notion database without any server-side code.Why Use a Notion Form Backend?
Using Notion to collect form data in Notion is an excellent way to keep your information organized and accessible. It’s a flexible solution that can be adapted to a wide variety of use cases, from simple contact forms to more complex data collection.How to Connect Your Form to a Notion Database
Follow these steps to integrate your form with Notion:1. Set Up Your Notion Database
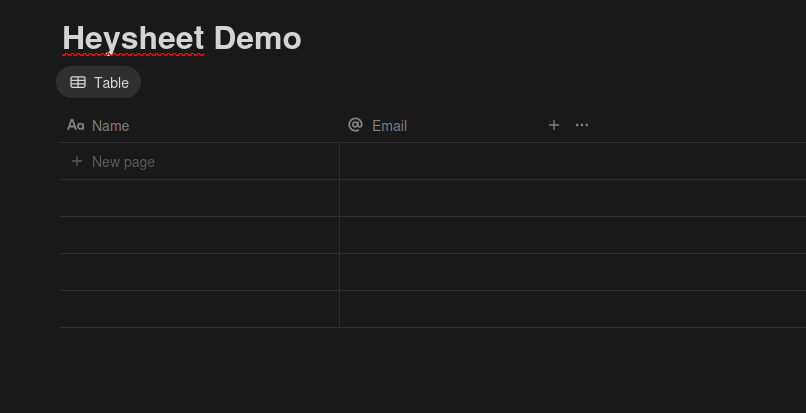
Create a new database in Notion and define the properties you want to collect from your form. The property names should match thename attributes of your form fields.
For example:
| Name | |
|---|---|
| Text | Email Property |
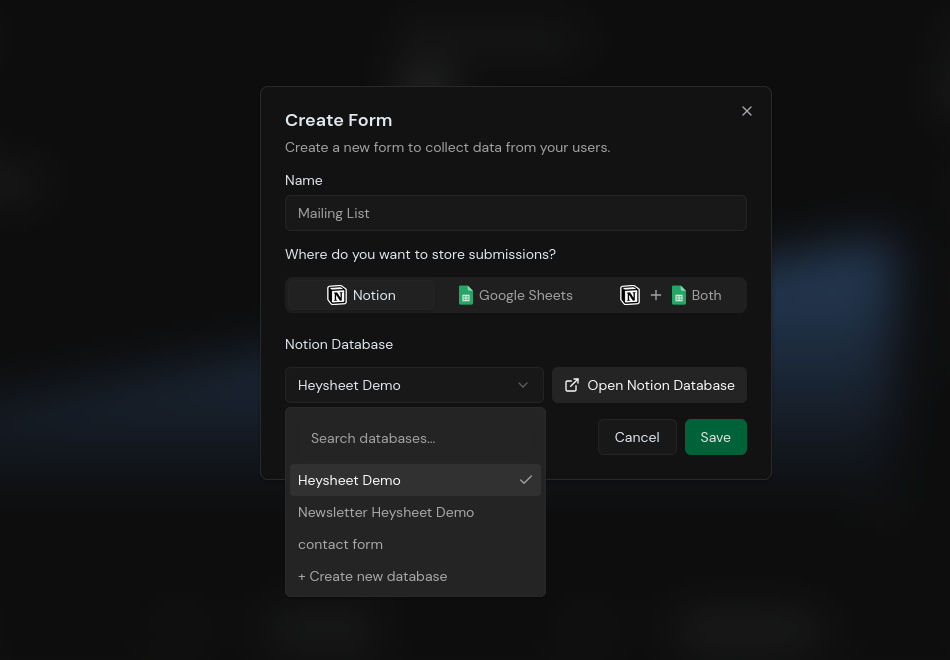
2. Create a Form in Heysheet
- Go to the Heysheet Dashboard.
- Click “Create New Form”.
- Select Notion as the destination.
- Connect your Notion account and choose the database you want to use.
3. Get Your Form Endpoint
Heysheet will provide you with a unique URL that acts as a form submission webhook. You’ll use this endpoint in your HTML form.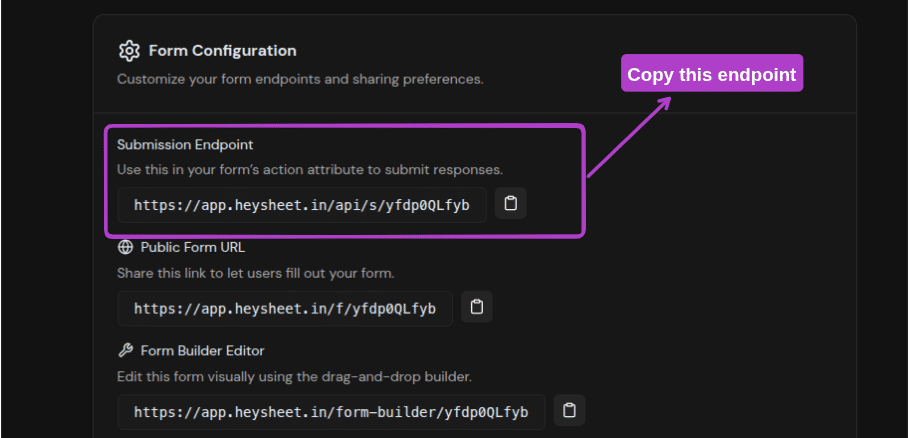
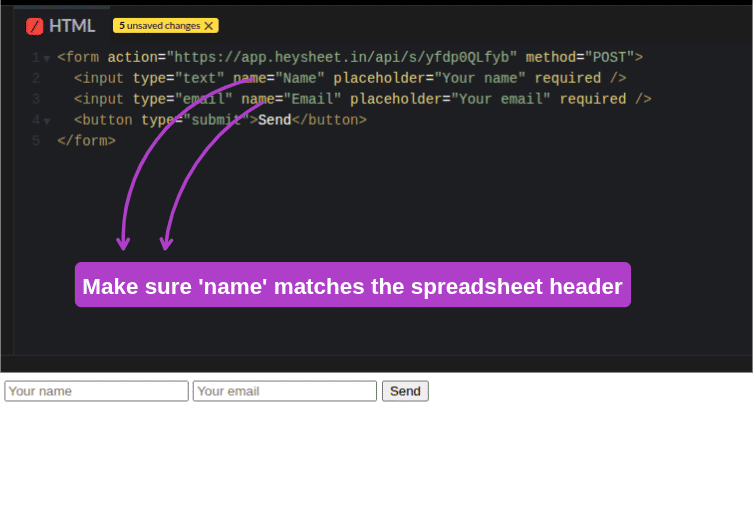
4. Configure Your HTML Form
Update your form’saction attribute to your Heysheet endpoint and set the method to POST.
name attributes in your form must match the property names in your Notion database.
5. Test Your Form
Submit a test entry. The data will be added as a new item in your Notion database instantly.
Key Features of the Notion Integration
- No Backend Needed: Heysheet is a simple form submission backend that works out of the box.
- Static Site Friendly: The perfect Notion form backend for static sites and Jamstack applications.
- Secure and Reliable: We handle all the complexities of the Notion API for you.
- Developer-Focused: A powerful tool for developers who want to handle form submissions with an API.
Use Cases for Notion Forms
- Contact forms
- Bug reports
- Feature requests
- User feedback
- Waitlists